Wednesday, August 28, 2013

All About Blocking Locks in Oracle

A  very  nice  post  has  been  written  by  Oracle  Ace Director  Arup Nanda  about the  Blocking  Locks . It  is  so simple  and  brilliantly explained . Check  the  below  link  and  enjoy  reading  about  basic  concepts behind locks . Before going to this link , read my previous post on ITL ( Interested Transaction List)  for better understading of this post .
http://arup.blogspot.in/2011/01/how-oracle-locking-works.html

Another  Brilliant  demo  on  Blocking  lock is  explained  by  "Natalka Roshak" .  She  has so wonderfully  explained .  Enjoy reading this link too. 

Here,  i  have  added  few  more query on  locks along  with  it's output . For  demo purpose , i  have created  a  table "blck_tab"  and  locked this  table manually  and accessing this locked table from other sessions .Let's have a look .

SQL> create table blck_tab (id number , name varchar(22));
Table created.

SQL> insert into blck_tab values(1,'abc');
1 row created.

SQL> insert into blck_tab values(2,'xyz');
1 row created.

SQL> insert into blck_tab values(3,'pqr');
1 row created.

SQL> commit;
Commit complete.

SQL> select * from blck_tab  for update ;             ----- Table Locked
        ID               NAME
----------    ----------------------
         1                   abc
         2                   xyz
         3                   pqr

Session 1 : 

SQL>conn test1/test1
SQL> update test.blck_tab set name='qwert' where id=3;
--->>  Waiter   <---- 

Session 2 : 

SQL> conn hr/hr
SQL> delete test.blck_tab where id=1;
--->>  Waiter   <---- 


Query to check locks :
(For Non-RAC)
SQL> SELECT  SID, DECODE(BLOCK, 0, 'NO', 'YES' ) BLOCKER,
  2  DECODE(REQUEST, 0, 'NO','YES' ) WAITER
  3  FROM   V$LOCK
  4  WHERE  REQUEST > 0 OR BLOCK > 0
  5  ORDER BY block DESC;
   SID     BLOCKER      WAITER
------     ------------       ----------
    37            YES                 NO
    34             NO                 YES
    31             NO                  YES
or 

SQL> select l1.sid, ' IS BLOCKING ', l2.sid
  2  from gv$lock l1, gv$lock l2
  3  where l1.block >0 and l2.request > 0
  4  and l1.id1=l2.id1
  5  and l1.id2=l2.id2;
       SID    'ISBLOCKING'         SID
----------  ------------------      --------
        37      IS BLOCKING          31
        37      IS BLOCKING          34

For RAC 
SQL>select distinct s1.username || '@' || s1.machine || ' ( INST=' || s1.inst_id || ' SID=' || s1.sid || ' )  is blocking '|| s2.username || '@' || s2.machine || ' ( INST=' || s1.inst_id || ' SID=' || s2.sid || ' ) ' AS blocking_status from gv$lock l1, gv$session s1, gv$lock l2, gv$session s2 where s1.sid=l1.sid and s2.sid=l2.sid and l1.BLOCK>0 and l2.request > 0and l1.id1 = l2.id1 and l2.id2 = l2.id2 and l1.inst_id = s1.inst_id;
BLOCKING_STATUS
------------------------------------------------------------------------------------------------------------
TEST@WORKGROUP\NEERAJ-7D69D37B ( INST=1 SID=37 )  is blocking TEST1@WORKGROUP\NEERAJ-7D69D37B ( INST=1 SID=34 )

TEST@WORKGROUP\NEERAJ-7D69D37B ( INST=1 SID=37 )  is blocking HR@WORKGROUP\NEERAJ-7D69D37B ( INST=1 SID=31 )


Expanded Lock  Query
===============
SQL> SELECT vs.username,  vs.osuser,   vh.sid locking_sid,  vs.status status,
 vs.module module,   vs.program program_holding,   jrh.job_name,   vsw.username,
 vsw.osuser,   vw.sid waiter_sid,   vsw.program program_waiting,  jrw.job_name,
 'alter system kill session ' || ''''|| vh.sid || ',' || vs.serial# || ''';'  "Kill_Command"
FROM  v$lock vh,  v$lock vw,  v$session vs,  v$session vsw,
 dba_scheduler_running_jobs jrh,
 dba_scheduler_running_jobs jrw
WHERE     (vh.id1, vh.id2) IN (SELECT id1, id2  
 FROM v$lock
 WHERE request = 0
 INTERSECT
 SELECT id1, id2
 FROM v$lock
 WHERE lmode = 0)
 AND vh.id1 = vw.id1
 AND vh.id2 = vw.id2
 AND vh.request = 0
 AND vw.lmode = 0
 AND vh.sid = vs.sid
 AND vw.sid = vsw.sid
 AND vh.sid = jrh.session_id(+)
 AND vw.sid = jrw.session_id(+);


Blocking locks with Sid and SQl 

SQL> set lines 200
column pu format a8 heading 'O/S|login|ID' justify left
column su format a15 heading 'Oracle/User ID' justify left
column prog format a15 heading 'Program' justify left
column machine format a15 heading 'machine' justify left
column stat format a8 heading 'Session|Status' justify left
column sser format 999999 heading 'Oracle|Serial|No' justify right
column txt format a28 word heading 'SQL TEXT' 
column RUNT format a15 word heading 'Run Time' 
set pagesize 1000
select
 s.username su,
 s.program prog,
 s.sid sid,
 lpad(p.spid,7) pid,
 substr(sa.sql_text,1,2000) txt,
 ltrim(to_char(floor(s.last_call_et/3600),'00009')) ||':'
 || ltrim(to_char(floor(mod(s.last_call_et,3600)/60),'09')) ||':'
 || ltrim(to_char(mod(s.last_call_et,60),'09')) RUNT
from v$process p,
 v$session s,
 v$sqlarea sa
where p.addr = s.paddr
 and s.username is not null
 and s.sql_address=sa.address(+)
 and s.sql_hash_value=sa.hash_value(+)
 and s.sid in (SELECT   SID FROM     V$LOCK WHERE    REQUEST > 0 OR BLOCK > 0)
order by 1,2
/
Oracle/User ID  Program           SID     PID          SQL TEXT                                  Run Time
--------------- ---------------          ------- -------   ----------------------------                ---------------
HR              sqlplus.exe             31        2812    delete test.blck_tab where         00001:32:11
                                                                                 id=1

TEST            sqlplus.exe             37    1928                                                          00000:06:35
TEST1           sqlplus.exe             34    1880       update test.blck_tab set            00002:11:34
                                                                            name='qwert' where id=3


Blocker/Waiter object details

SQL> col object_name for a28
SQL> col owner for a15
SQL> select do.owner,do.object_name , row_wait_obj#, row_wait_file#, row_wait_block#, row_wait_row#, dbms_rowid.rowid_create (1, ROW_WAIT_OBJ#, ROW_WAIT_FILE#,ROW_WAIT_BLOCK#, ROW_WAIT_ROW#)
  2  from
  3  v$session s,
  4  dba_objects do
  5  where sid in (select l2.sid blocking from v$lock l1, v$lock l2 where l1.block =1 and l2.request > 0 and l1.id1=l2.id1 and l1.id2=l2.id2) and
  6  s.ROW_WAIT_OBJ# = do.OBJECT_ID;

OWNER           OBJECT_NAME    ROW_WAIT_OBJ# ROW_WAIT_FILE# ROW_WAIT_BLOCK# ROW_WAIT_ROW# DBMS_ROWID.ROWID_C
--------------- -------------- ------------- -------------- --------------- ------------- ------------------
TEST            BLCK_TAB        74697              4             524             2          AAASPJAAEAAAAIMAAC

TEST            BLCK_TAB        74697              4             524             0          AAASPJAAEAAAAIMAAA


Note for RAC  use  gv$ instead of v$ .


Enjoy    :-) 


Sunday, July 21, 2013

What are Patches and how to apply patches ?

Patching  is one  of  the  most  common  task  performed  by  DBA's  in  day-to-day  life  . Here , we  will discuss  about  the various  types  of  patches  which  are  provided  by  Oracle  . Oracle  issues  product fixes  for  its  software called  patches. When  we  apply  the  patch  to  our  Oracle  software installation, it updates  the  executable  files, libraries,  and  object  files in  the software  home directory . The patch application  can  also  update  configuration  files and  Oracle-supplied  SQL schemas . Patches  are  applied by  using  OPatch, a utility supplied by Oracle , OUI  or  Enterprise Manager Grid Control . 
Oracle Patches are of various kinds . Here , we are broadly categorizing  it  into  two groups .

1.) Patchset  : 
2.) Patchset Updates : 

1.) Patchset  :  A group of  patches  form  a  patch  set. Patchsets  are  applied  by  invoking OUI (Oracle Universal Installer) . Patchsets  are  generally  applied  for  Upgradation  purpose . This  results  in  a version change  for our  Oracle  software, for  example,  from  Oracle Database 11.2.0.1.0  to  Oracle  Database 11.2.0.3.0.  We will cover this issue later .

2.) Patchset Updates : Patch Set Updates  are  proactive cumulative patches containing  recommended bug fixes that are released on a regular and predictable schedule .  Oracle has catergaries as :

i.) Critical Patch Update (CPU)  now refers  to  the  overall  release of security  fixes each  quarter  rather than the cumulative database security  patch  for  the quarter.  Think  of  the  CPU as  the  overarching quarterly release and not as a single patch .

ii.) Patch Set Updates (PSU)  are  the same cumulative patches  that  include  both  the  security  fixes and priority  fixes.  The key with  PSUs  is  they are  minor version  upgrades   (e.g., 11.2.0.1.1  to  11.2.0.1.2). Once a  PSU  is  applied, only  PSUs  can  be  applied  in  future  quarters  until  the database  is  upgraded to a new base version. 

iii.) Security Patch Update (SPU)  terminology  is  introduced  in  the October 2012 Critical Patch Update as  the  term  for the quarterly security patch.  SPU  patches are the same  as  previous  CPU  patches,  just a new  name .  For  the database, SPUs  can  not  be  applied  once  PSUs  have  been  applied  until  the database is  upgraded  to a  new base version.

iv.) Bundle Patches  are the quarterly patches for Windows  and  Exadata  which  include  both the quarterly security patches as well as recommended fixes. 

PSUs(PatchSet Updates) or CPUs(Critical Patch Updates) ,SPU are applied via opatch utility.

How to get Oracle Patches :
We  obtain  patches  and  patch  sets  from  My Oracle Support (MOS) . The  ability  to  download a specific  patch  is  based  on  the contracts associated  to  the support  identifiers  in  our  My Oracle Support  account.  All  MOS  users  are  able  to  search  for  and  view all  patches,  but  we  will  be prevented  from  downloading  certain types  of  patches  based  on  our  contracts.

While   applying   Patchset or  patchset upgrades , basically there are two entities in the Oracle Database environment 
i. )  Oracle Database Software
ii.)  Oracle Database

Most of the database patching activities involve, in the following sequence

  •  Update  "Oracle Database Software"  using   './runInstaller'  or   'opatch apply'   known  as "Installation"  Tasks.
  • Update  "Oracle Database"  (catupgrd.sql  or  catbundle.sql ...etc)  to  make  it  compatible  for  newly  patched  "Oracle database Software"   known  as  "Post Installation"  tasks. 

Patchset  OR  CPU/PSU  (or one-off)  patch  contains  Post  Installation  tasks  to  be  executed  on  all Oracle  Database  instances  after  completing  the Installation  tasks. If  we  are  planning  to  apply  a patchset  along  with  required  one-off-patches (either CPU or PSU or any other one-off patch),  then  we can  complete  the  Installation  tasks  of  the   Patchset+CPU/PSU/one-off  patches at once and then execute  Post  Installation  tasks of  the  Patchset+CPU/PSU/one-off  patches  in  the  same sequence as they were  installed . 

This  approach  minimizes  the  requirement  of  database  shutdown  across  each  patching  activity and simplifies  the  patching  mechanism as two tasks: 
  • Software update and then
  • Database update.

Here , we  will  cover  the  Opatch Utility in details along with example. 

OPatch  is  the  recommended (Oracle-supplied)  tool  that  customers  are  supposed  to  use  in  order to apply  or  rollback  patches. OPatch  is  PLATFORM  specific . Release is based on Oracle Universal Installer version .   OPatch  resides in  $ORACLE_HOME/OPatch .  OPatch  supports  the  following :

  • Applying  an  interim  patch.
  • Rolling  back  the  application  of  an  interim  patch.
  • Detecting  conflict  when  applying  an  interim  patch  after  previous  interim  patches  have  been applied.  It  also  suggests  the  best  options  to  resolve a conflict .
  • Reporting on installed products and interim patch.

The  patch  metadata  exist in  the  inventory.xml  and  action.xml  files  exists under <stage_area>/<patch_id>/etc/config/   

Inventory  .xml  file  have  the  following  information :

  • Bug number 
  • Unique Patch ID
  • Date of  patch year  
  • Required and Optional components 
  • OS platforms ID 
  • Instance shutdown is required or not 
  • Patch can be applied online or not 

Actions   .xml  file  have  the  following  information .

  • File name and it location to which it need to be copied 
  • Components need to be re-linked 
  • Information about the optional and required components


Here are steps for applying  patches on linux Platform

1.) Download the required Patches from  My Oracle Support (MOS) : 

  • Login to metalink.
  • Click "Patches & Updates" link on top menu.
  • On the patch search section enter patch number and select the platform of your database.
  • Click search.
  • On the search results page, download the zip file.

2.)  Opatch version  :
Oracle  recommends  that  we  use  the  latest  released  OPatch , which  is  available  for  download  from My  Oracle  Support .  OPatch  is compatible  only  with  the version  of  Oracle  Universal  Installer  that  is installed  in  the  Oracle  home. We  can  get  all  Opatch  command  by  using  Opatch  help  command .

3.) Stop all the Oracle services  :
Before applying Optach , make sure all the Oracle services are down . If they are not down then stop/down the oracle related Services . Let's crosscheck it 

$ ps -ef |grep pmon
oracle   15871 15484  0 11:20 pts/2    00:00:00 grep pmon

$ ps -ef |grep tns
oracle   15874 15484  0 11:20 pts/2    00:00:00 grep tns

4.) Take Cold Backup :  
It  is  highly  recommended  to backup  the software  directory  which  we  are  patching  before  performing any  patch  operation . This  applies  to  Oracle  Database  or Oracle  Grid  Infrastructure  software installation  directories.  Take the backup of following 

  • Take the Oracle software directory backup 

$ tar -zcvf   /u01/app/oracle/product/11.2.0/ohsw-bkp-b4-ptch.tar.gz   /u01/app/oracle/product/11.2.0   

  • Take  backup of oracle database . 

$ tar  -zcvf    /u01/app/oracle/oradata/dbfl-b4-ptch.tar.gz     /u01/app/oracle/oradata     
Here all the database files are in oradata  directory .

  • Take backup of OraInventary

$ tar  -zcvf   /u01/app/oraInventary/orinv-b4-ptch.tar.gz     /u01/app/oraInventary  


5.)  Apply  OPatches 
Set  our current directory to the directory where the patch is located and then run the OPatch utility by entering the following commands:

$ export  PATH=$ORACLE_HOME/OPatch:$PATH:
$ opatch apply .


6.)  Post Installation : 
Once , the  Opatch  installation  completed  successfully . Perform  the  post  Installation steps . Startup  the oracle  database  with  new  patched  software and  run catbundle.sql  scripts  which  is  found  in           $ORACLE_HOME/rdbms/admin   directory .
The catbundle.sql execution is reflected in the dba_registry_history view by a row associated with bundle series PSU.


7.) Finally check the status of patch status : 
We can check the final status of applied patched new Oracle Home by using the below command .
SQL > select  *   from  dba_registry_history   order  by  action_time  desc ;


Notes :
i.) If  we are using  a  Data Guard Physical Standby database, we  must  install  this  patch  on  both  the primary  database and  the physical  standby database .

ii.)  While applying patching take care of  mount point status .There should be sufficient Space .


There are few good demo on Optach . Check the below link 
Click Here
Click Here

For More About Opatch : Click Here


Enjoy   :-)   :-) 


Sunday, June 30, 2013

Oracle Database 12C Release 1 Installation on Linux


Oracle 12c (Oracle 12.1.0.1) has been released and is available for download . Oracle 12C Installation steps are almost  same as  that  of   Oracle 10g and 11g Installations  . Oracle  12c  is  available  for  64 bit . Here , we will see step-by-step Installation of Oracle 12C database .  

Step  1 :  Oracle S/W Installation
We can download Oracle 12c  s/w from e-delivery or from OTN .  Below are Link

http://www.oracle.com/technetwork/database/enterprise-edition/downloads/index.html
https://edelivery.oracle.com/EPD/Download/get_form?egroup_aru_number=16496132


Step 2 :  Hardware Requirements 
Oracle Recommand the following requirement for installation .
RAM     =  2GB of RAM or more
Swap    = 1.5 times of RAM if RAM less than 2 GB , equal to size of RAM is RAm size is more than 2GB
Disk Space      = More than 6.4 GB for Enetrprise Edition .
Tmp directory  =  Minimum 1GB of  free space


Step 3 :  Hardware Verifications 
[root@server1 ~]# grep  MemTotal   /proc/meminfo
MemTotal:      3017140 kB

[root@server1 ~]# grep  SwapTotal   /proc/meminfo
SwapTotal:     4105420 kB

[root@server1 ~]# df  -h  /tmp
Filesystem            Size    Used     Avail     Use%     Mounted on
/dev/sda1              46G   19G      25G       44%          /

[root@server1 ~]# df  -h 
Filesystem            Size       Used     Avail      Use%      Mounted on
/dev/sda1              46G      19G       25G       44%          /
tmpfs                    1.5G       0          1.5G       0%           /dev/shm
/dev/hdc              3.4G       3.4G        0        100%         /media/RHEL_5.3 x86_64 DVD

[root@server1 ~]#  free
                  total           used           free           shared    buffers     cached
Mem:       3017140     715376    2301764          0       109776     384096
-/+ buffers/cache:        221504    2795636
Swap:      4105420          0         4105420

[root@server1 ~]# uname  -m 
x86_64

[root@server1 ~]# uname  -a 
Linux   server1.example.com      2.6.18-128.el5 #1    SMP    Wed    Dec 17 11:41:38 EST   2008    x86                                                                                        
_64 x86_64 x86_64      GNU/Linux


Step 4 :  Packages Verifications 
The  following  packages  are  required  for  the  Oracle  Installation , so  make  sure  all  the  packages are installed .

make-3.81
binutils-2.17.50
gcc-4.1.2                       (x86_64)
gcc-c++-4.1.2               (x86_64)
compat-libcap1              (x86_64)
compat-libstdc++-33     (x86_64)
glibc-2.5-58                   (x86_64)
glibc-devel-2.5               (x86_64)
libgcc-4.1.2                    (x86_64) 
libstdc++-4.1.2               (x86_64)  
libstdc++-devel-4            (x86_64)  
libaio-0.3.106                  (x86_64)
libaio-devel-0.3               (x86_64) 
ksh 
sysstat  
unixODBC  
unixODBC-devel

Execute  the  below command  as  root  to  make  sure  that  we  have  all  this  rpms  installed. If  not installed,  then  download  them   from  appropriate  linux  site or  we will  find  the  package from  the Red Hat Enterprise Linux 5 DVD . For example , 
# rpm  -qa  | grep  glib* 


The  above  command  will  display  all  the  installed  packages,  name  starting  with   glib,  similarly  we  can  check  for  all  others  packages . If  any of  the  above  packages  are  not  installed, run  the  following command:
# rpm  -ivh  </path/to/><version>.i386.rpm


Steps 5  :  Kernel Parameters
Add the below kernel Parameters in the  /etc/sysctl.conf  file

fs.file-max = 6815744
kernel.sem = 250 32000 100 128
kernel.shmmni = 4096
kernel.shmall = 1073741824
kernel.shmmax = 2147483648
net.core.rmem_default = 262144
net.core.rmem_max = 4194304
net.core.wmem_default = 262144
net.core.wmem_max = 1048576
fs.aio-max-nr = 1048576
net.ipv4.ip_local_port_range = 9000 65500

After  adding these  lines  to  /etc/sysctl.conf , run  the  below command  as  root  to  make  them  enabled.
 #  sysctl   -p 


Step 6 :  Edit the /etc/security/limits.conf file
To  improve the  performance  of   the  software  on  Linux  systems, we  must  increase  the  following  shell limits   for  the  oracle  user . Add  the  following  lines  to the  /etc/security/limits.conf  file :

oracle    soft  nproc  2047
oracle    hard  nproc  16384
oracle    soft  nofile  1024
oracle    hard  nofile  65536
Where  "nproc"  is  the maximum  number  of  processes  available to  the  user  and  "nofiles"  is  the  number  of  open  file  descriptors.


Step 7  :  Create User and Groups 
Starting  with  Oracle  Database  12c , we  can  create  new  administrative  privileges  that  are  more  task-specific  and  less  privileged  than  the  OSDBA/SYSDBA  system privileges  to support specific administrative  privileges  tasks  required  for  everyday  database  operation. Users  granted  these  system privileges  are  also  authenticated  through operating system group membership .

We  do  not  have to  create  these  specific  group  names, but  during  installation we  are  prompted  to provide  operating  system  groups  whose  members  are  granted  access  to  these  system  privileges.  we  can  assign  the same  group  to  provide  authentication  for  these  privileges, but  Oracle  recommends  that we  should  provide  a  unique  group  to  designate each  privileges.

i .) The OSDBA group (typically, dba)  :  This group identifies operating system user accounts that have database administrative privileges (the SYSDBA privilege).
#groupadd  -g  501  dba  

ii .) The Oracle Inventory Group (oinstall) :  This group owns the Oracle inventory that is a catalog of all Oracle software installed on the system. A single Oracle  Inventory group is required for all installations of Oracle software on the system.
# groupadd  -g  502  oinstall  
iii .) The OSOPER group for Oracle Database (typically, oper)  :  This  is an optional  group. We  create  this  group  if  we  want  a separate  group of  operating  system  users  to  have a  limited  set  of database  administrative  privileges  for  starting  up  and shutting  down the  database  (the SYSOPER privilege). 
# groupadd  -g  503  oper  

iv .) The OSBACKUPDBA group for Oracle Database (typically, backupdba)  :   Create this group if we  want a  separate  group of  operating  system  users  to  have a  limited  set  of database backup and recovery related administrative privileges (the SYSBACKUP privilege).
# groupadd   -g   504   backupdba 

v .) The OSDGDBA group for Oracle Data Guard (typically, dgdba)  :   Create  this  group  if  we want  a  separate  group of  operating  sytsem  users to  have a  limited  set of   privileges  to  administer  and monitor  Oracle Data Guard  (the SYSDG privilege).
# groupadd   -g   505   dgdba 

vi .) The OSKMDBA group for encyption key management (typically, kmdba)   :  Create  this  group if  we  want  a  separate group  of  operating  sytem  users  to have a  limited  set  of  privileges  for encryption  key  management  such  as Oracle  Wallet  Manager  management  (the SYSKM privilege).
#  groupadd   -g   506   kmdba  

vii .) The OSDBA group for Oracle ASM (typically, asmdba) :   The  OSDBA  group  for  Oracle ASM can  be  the  same group u sed as  the OSDBA  group  for  the database, or we  can  create a separate OSDBA group for Oracle ASM to provide administrative access to Oracle ASM instances .
# groupadd  -g  507   asmdba 

viii .) The OSASM group for Oracle ASM Administration (typically, asmadmin)  :  Create  this  group as  a  separate group if  we  want  to  have  separate  administration  privileges  groups  for  Oracle  ASM and Oracle  Database  administrators. Members  of  this  group  are  granted  the  SYSASM  system privileges  to  administer  Oracle ASM  .
#  groupadd  -g   508   asmoper

ix .)  The OSOPER group for Oracle ASM (typically, asmoper)  :   This is an optional group. Create this group  if  we  want  a separate  group of  operating  system  users  to  have  a limited  set  of  Oracle instance  administrative  privileges  (the SYSOPER for ASM privilege),  including starting up and stopping the  Oracle  ASM  instance . By default ,  members of  the OSASM group  also  have all privileges granted by the SYSOPER for ASM  privilege.
# groupadd   -g   509  asmadmin 

x . ) Create Oracle user  :
# useradd -u 54321 -g oinstall -G dba,asmdba,backupdba,dgdba,kmdba  oracle
#passwd oracle
<<ORACLE PASSWORD >>

The  -u  option  specifies  the  user  ID. Using  this  command  flag  is optional  because the system can provide  with  an  automatically  generated  user  ID  number. However,  Oracle  recommends  that  we should specify a number. We must note the user ID number because we need it during preinstallation.


Step 8 :  Creating oracle directories 
As  per  OFA, oracle base directory has  the  path  :  /mount_point/app/oracle_sw_owner  where mount_point   is  the mount  point directory  for  the  file system  that  will  contain  the  Oracle software . I have  used  /u01  for  the mount point  directory. However, we  could  choose  another  mount point directory,  such  as  /oracle or /opt/soft.
# mkdir -p /u01/oracle/product/12.1.0/db_1
# chown -R oracle:oinstall /u01
# chmod -R 777 /u01


Step 9 :  Setting Oracle Enviroment 
Edit  the  /home/oracle/.bash_profile  file and  add  following  lines:
# su - oracle
$ vi  .bash_profile
export TMP=/tmp
export TMPDIR=$TMP
export ORACLE_BASE=/u01/oracle
export ORACLE_HOME=$ORACLE_BASE/product/12.1.0/db_1
export PATH=/usr/sbin:$PATH
export PATH=$ORACLE_HOME/bin:$PATH
export LD_LIBRARY_PATH=$ORACLE_HOME/lib:/lib:/usr/lib
export CLASSPATH=$ORACLE_HOME/jlib:$ORACLE_HOME/rdbms/jlib


Step 10  :   Check firewall and Selinux  
Make sure Selinux be either disable or permissive . Check "/etc/selinux/config" file and make following changes .
SELINUX=permissive
Once ,Selinux value is set than restart the server or or run the below command
# setenforce Permissive

If  Firewall is enabled ,we need to disable it . we can disable by using below command
# service iptables stop
# chkconfig iptables off


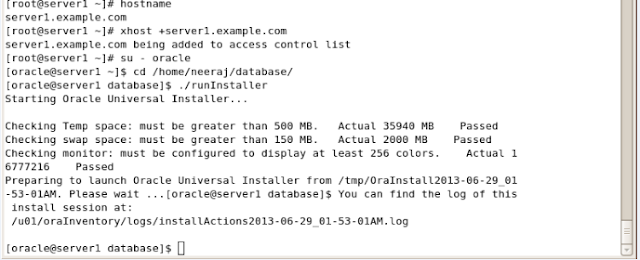
Step 11 :  Finally run the runInstaller for Installation of  Oracle 12c release 1


Once ,  runInstaller get initaited , OUI get invoked and rest are interative graphical console .


Click next and proceed forward .


Click  on "Yes"  button and proceed .


Select "Skip Software Updates" option and click on next button .


Select  "Create and configure a database" option and click on next button


Here , I selected the "Desktop Class" option . Click on next button


Enter the Administrative Password and click next


Click on "Yes" option and proceed forward


Click on next button


Make sure all the prerequisite must be successfull and passed  .
 

Summary page displays all the locations and database information . Click next


Oracle Database Installation in process


Execute the configurations scripts from root


Run the scripts from root .


Oracle Database in process


Database creation in process .


Database creation in process .


Database Creation complted .


Installation of Oracle database was successfull .


Finally connected  with Oracle 12c database .


Enjoy   :-)  :-)  :-) 


Thursday, June 27, 2013

Oracle Database 12c Available for Download

Finally, Oracle has released the most awaited oracle Database i.e, 12c (Oracle 12.1.0.1) . It  is available for download from the Oracle Software Cloud (formerly know as eDelivery) and  OTN (Oracle Tech Network) for 64bit linux and solaris  . Oracle 12c is not available for 32 bit .  Oracle has yet not released the AIX and Window database 12c s/w, hopefully will release soon . Here are links for download Oracle s/w. 

eDelivery          : Click here  to download from eDelivery .
OTN                  : Click here  to download from OTN .
Documentation : Click here  to download  document of 12c

There are some very exiting features in Oracle 12c Database .One of them is "Pluggable Database " which allows a  single Oracle database  instance to  hold  many other databases, allowing  for  more efficient  use of  system resources and easier management. I will be soon download and post about this features .

An official Oracle price list, which was updated Tuesday, showed a "multitenant" database option priced at $17,500 per processor. A processor license for the main  Enterprise  Edition  remained  priced at $47,500 per processor.


Enjoy    :-) 

Friday, May 24, 2013

ORA-00020 and Impact on database on increasing processes values


The maximum number of processes is specified by the initialization parameter "processes" . When this maximum number of process is reached, no more requests will be processed. If we are try to connect with database then we get the below errors . 

Here for testing purpose, i have set  my processes value to 30 for this demo .

[oracle@server1 ~]$ sqlplus "sys/xxx as sysdba"
SQL*Plus: Release 11.2.0.1.0 Production on Fri May 24 13:36:53 2013
Copyright (c) 1982, 2009, Oracle.  All rights reserved.
ERROR:
ORA-00020: maximum number of processes (30) exceeded

I usually check my alert logfile for any oracle errors  and find following info .

Alert logfile
Fri May 24 13:38:30 2013
ORA-00020: No more process state objects available
ORA-20 errors will not be written to the alert log for
the next minute. Please look at trace files to see all
the ORA-20 errors.

According  to oracle docs :

Error:  ORA 20  
Text:   maximum number of processes <num> exceeded
-------------------------------------------------------------------------------
Cause :  An operation requested a resource that was unavailable. The maximum number of processes is specified by the initialization parameter PROCESSES. When this maximum is reached, no more requests are processed.

Action : Try the operation again in a few minutes. If this message occurs often, shut down Oracle, increase the PROCESSES parameter in the initialization parameter file, and restart Oracle.

Finally , i have decided to increase the no. of processes but didn't find any exact formula or any optimal value  to set this parameter . So i have set it to 200 for now . Another issue here with us to connect with oracle, since we getting error while connecting with oracle . Here is one trick to create a session  by using  "Prelim" option . Interesting things about this option is that we can only use the "shut abort" command nothing else (AFAIK).  Here are the steps to set the processes value : 

[oracle@server1 ~]$  sqlplus -prelim  "sys/xxxx as sysdba"
SQL*Plus: Release 11.2.0.1.0 Production on Fri May 24 13:38:55 2013
Copyright (c) 1982, 2009, Oracle.  All rights reserved.

SQL> shut immediate
ORA-01012: not logged on

SQL>  shut abort
ORACLE instance shut down.

SQL> exit 

Once the instance is down we can easily increase the process value at mount stage  .

[oracle@server1 ~]$ sqlplus "sys/sys as sysdba"
SQL*Plus: Release 11.2.0.1.0 Production on Fri May 24 13:51:40 2013
Copyright (c) 1982, 2009, Oracle.  All rights reserved.
Connected to an idle instance.

SQL> startup mount
ORACLE instance started.

Total System Global Area  418484224 bytes
Fixed Size                  1336932 bytes
Variable Size             310380956 bytes
Database Buffers          100663296 bytes
Redo Buffers                6103040 bytes
Database mounted.

SQL> alter system set processes=200 scope=spfile;
System altered.

SQL> shut immediate
ORA-01109: database not open

Database dismounted.
ORACLE instance shut down.

SQL> startup
ORACLE instance started.

Total System Global Area  418484224 bytes
Fixed Size                  1336932 bytes
Variable Size             310380956 bytes
Database Buffers          100663296 bytes
Redo Buffers                6103040 bytes
Database mounted.
Database opened.

SQL> select name,open_mode from v$database;
NAME      OPEN_MODE
--------- --------------------
ORCL      READ WRITE


Impact on db while increasing the processes  :: 
While googling , i found a very useful comment  by "Jonathan Lewis" .According to him , Increasing processes from say 1000 to 5000 increases the amount of shared memory that needs to be reserved  at the O/S level and disrupt the memory in the SGA. The OS must be configured to support the larger amount of shared memory.

The impact at the O/S is that every process that starts up will want to build a memory map for the SGA - depending on the way we have configured memory pages and the way that strategy our O/S adopts to build maps it could demand a huge amount of O/S memory in a short time. The technology we need to avoid this issue comes in two different flavours: large memory pages, and shared memory maps.

The impact on the SGA is two-fold - each process and session has to create an entry in v$process and v$session, and allocate various memory structures in the SGA: acquiring the rows in v$session and v$process are serial actions, and the memory allocation in the SGA can cause massive flushing of the library cache . 

So , it is advisable to increase the number of processes while keeping it's impact in mind .


Enjoy    :-)